We need download suitable J Developer version based on your present EBS Application
Below this based on note no We can find out.
OA Framework - How to find the correct version of JDeveloper to use with eBusiness Suite 11i or Release 12.x [ID 416708.1]
After downloading we need to Un Zip the folder, it will give three folders.
- jdevbin 2. jdevdoc 3. jdevhome
Then We need to configure Environment variables.
Right Click on my computer , properties
Click on Advanced tab
Click on Environment Variables
Click on User variables New Button
Click on Ok Button
Down Load the DBC file from the server either using putting or WINSCP from the following path
/d01/oracle/PROD/inst/apps/PROD_prodapps/appl/fnd/12.0.0/secure
PROD.dbc
This DBC file move to following path in JDeveloper
C:\JDeveloper\jdevhome\jdev\dbc_files\secure
Then you will copy the JDevw to Desktop from following path
C:\JDeveloper\jdevbin\jdev\bin
Create the following directory as per your VO path under myclasses & myprojects
C:\JDeveloper\jdevhome\jdev\myprojects\oracle\apps\ap\invoice\request\negotiation\server
C:\JDeveloper\jdevhome\jdev\myclasses\oracle\apps\ap\invoice\request\negotiation\server
Then click on  icon
icon
Click on Connection & Database
Right click on Database to create DB connection
Click on next
Give connection like OOMCO test and then click on Next
Give database user name & Password
Then Click on next
Here, we have to give host name ,port ,sid
Click on next
Then click on Test Connection & here will show DB connection credentials correct or not
Click on Next
Then click on Finish, DB connection has been created.
Then we have to identify the VO path in the application.
Click on About this page to identify the VO
Click on Expand All
VO Name: NotifPGAcctSumVO
Click on VO
Here , 3 columns are showing, we need add currency, Requester Name
Create the path under my projects and download from the server all the files
From this server path
/u01/oracle/CLN/apps/apps_st/comn/java/classes/oracle/apps/ap/invoice/request/negotiation/server
To J Developer path
C:\JDeveloper\jdevhome\jdev\myprojects\oracle\apps\ap\invoice\request\negotiation\server
Create the workspace and click on application Navigator
Click on Ok
And create the project
Click on Project
Give Project Name: xxomcoproject
Under my projects
Default package as per your VO Path
oracle.apps.ap.invoice.request.negotiation.server
then Click on Next
Enable check box : use Repository for design Time to connect DB which we created
Click on next
And choose the dbc file Browse
Click on open
Give Database User name & Passward
Application Short Name & Responsibility key
Click on next
Click On finish Workspace , Project has been created.
Then Create the VO
Right click on server
Click on Next
Choose package name and give custom Vo name OOMCONotifPGAcctSumVO
Choose extend view which we need extend from browse
Then click on ok
Click next
Enable Radio button Updatable
And click on Next
And click on next
And create new Attributes which is need to add additional columns
Click New button
Click on Ok
Click on Next
Click On next
Click on Next
Click On next
Click on next
Click on next
And click on finish VO object has been created.
Right click on project and click project properties and substitutions
Click on Business components & Substitutions
Select Original VO From left pane & Select custom VO From Right Pane then add if first time or Update then Click on Ok Button.
Right click on Project Make & Rebuild
Finally Go to run Make Project
Then Save All files fileSave All
Move all custom VO xml & .class files , server.xml files to server from myclasses folder
Run Import script From command prompt
C:\JDeveloper\jdevbin\oaext\bin\jpximport C:\JDeveloper\jdevhome\jdev\myclasses\oomco.jpx -username apps -password apps -dbconnection "(DESCRIPTION=(ADDRESS=(PROTOCOL=tcp)(HOST=oomcotestdb.oomco.com)(PORT=1529))(CONNECT_DATA=(SID=CLN)))"
Bounce Apache by using below script
1) login to your instance with putti or any other software
2) cd $ADMIN_SCRIPTS_HOME
3) adapcctl.sh stop
4) adoacorectl.sh stop
5) adapcctl.sh start
6) adoacorectl.sh start
Login into application check VO and attributes are coming or not
Then personalize the page
In the above screen under Amount Summary need add fields Requester Name, currency, we need to personalize, enable personalization profiles
Profiles are:
Personalize Self-Service Defn - Yes
FND: Personalization Region Link Enabled – Yes
If you see all Personalization link enabled, Now we can personalize Page
Now Click on Personalize Advanceed Table
Click on create item
Moving From Dev Instance to Production Instance
Set profile option “FND: Personalization Document Root Path”. The value of this profile option will be the directory name on mid-tier Ensure that this directory exists on mid-tier machine of the destination environment
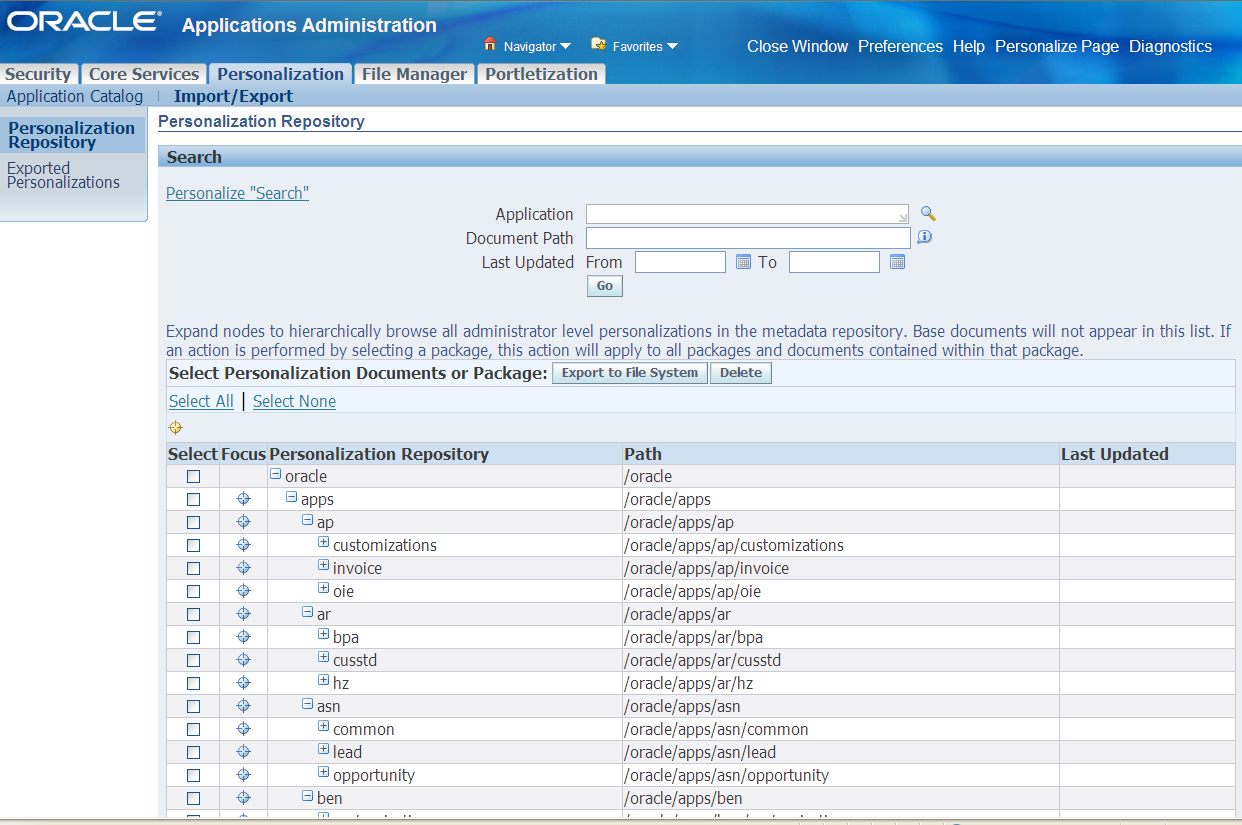
Login to Functional Administrator Responsibility
Navigate to tab “Personalization”
Click on Import/Export
Search the desired personalizations for the application name
Extract the personalilzations
Login to linux/unix mid-tier and cd to directory specified in profile option
Do tar –cvf xxPersonalizations.tar ./*
Set profile option “FND: Personalization Document Root Path”. The value of this profile option will be the directory name on mid-tier Ensure that this directory exists on
mid-tier machine of the destination environment
FTP the xxPersonalizations.tar to the directory specific in above profile option
Cd to that directory
tar –xvf xxPersonalizations.tar *****
Login to Functional Administrator Responsibility
Navigate to tab “Personalization”
Click on Import/Export
Select and Import the personalizations that have been imported
Bounce the Apache
1) login to your instance with putti or any other software
2) cd $ADMIN_SCRIPTS_HOME
3) adapcctl.sh stop
4) adoacorectl.sh stop
5) adapcctl.sh start
6) adoacorectl.sh start

No comments :
Post a Comment