Overview: In this tutorial I will explain how to read a CSV file using ReadFileAdapter and then to write a CSV file using WriteFileAdapter. We don’t have two separate FileAdapters but based on the read and write operation we mention them as ReadFileAdapter or WriteFileAdapter.
ReadFileAdapter will Receive the input data from file and translate the data based on the translation logic defined and post the XML messages.
WriteFileAdapter will receive the XML messages and translate it into actual data and write to a file.![](https://lh4.googleusercontent.com/gQu3cbir24dui5QCPuet8bLyP3jOHjVNe4UevcfsvhexgV6GRhdjU3wETpCzTmNgBng0SeG84fgEWcEHfgkyVmpUUJft9rCbDHSU6saJ_nRFwTmfn52OerPyj43dLVaaM1g)
FileAdapter supports the following file formats.
1.XML
2.Delimited (Delimiter can be anything)
3.Fixed position
4.Binary Data
You don’t need to use both ReadFileAdapter and WriteFileAdapter in a single process, for example you can read the data from file using ReadFileAdapter and write data to a database using DBAdapter. In other way you can get the data from a database and write it to a file using WriteFileAdapter. This is purely based on the business requirement and up to us how we are going to use them.
System Requirements:
1. jDeveloper 10.1.3
2.SOA Suite 10.1.3
Connections Required:
1.Start the SOA Suite
2.Create Application Server Connection
3.Create Integration Server Connection
Start the SOA Suite:
If you don’t have SOA Suite already installed on your machine click here to download and install it.
If you have SOA Suite installed on your machine navigate Start >> All Programs >> Oracle – >>Start SOA Suite![](https://lh4.googleusercontent.com/wFXW11u8PaEcUOiuhEc0AKu63M5LNyTgHvkGeMm1_K_4gn84pQiLrFiCBrVwZiWxAN-Mxfym-ASOMbC4MznAgIlI4mfN2vev9D3SNjX7urXLi2hT8d-woaV6z7m7lcupn2E)
Once your Application Server starts successfully you will see the screen below![](https://lh4.googleusercontent.com/qqMiIc3Bex2i5D6Y3LybYB1lSGcgZozfJ9dPBgNCR3_o8wTWD5SdAX1mgz4C4mWFD8ZzmyAWKkjOvoW2nDcZgfbgu7Vq8HzOqDLsPS1-33WBXOKPQ4hSXY-6sbs7zbxoErI)
Create Application Server Connection
Navigate to Connection Navigator by clicking view >> Connections Navigator or by pressing Ctrl + Shift + o![](https://lh6.googleusercontent.com/R2o06bEy00OuIAVnwWjVxC_j_yOrIvDinjxhH3_gLWXE8x1S3D89Urk4cVhJCASsjOCpEEUmGlWpRIbWtnHtPsxyqjBWhL2NfVA99cRTZCCDOe-NvJMM8n2tWYqjquLQHyk)
Right click on “Application Server” and click New Application Server Connection![](https://lh4.googleusercontent.com/0y9drGy0l_fnX7ooGRFzlwqdXcd0v_PWogReOS4q2yM9k9YTjlYhB0SUC2DHBZ4TQ7t6gNilUIXmMnk8W0uy4G6ThSPIgfILTOg-QLhq65dS-auMy8HU7K_CmbNYXli7LYo)
Wizard opens with welcome screen
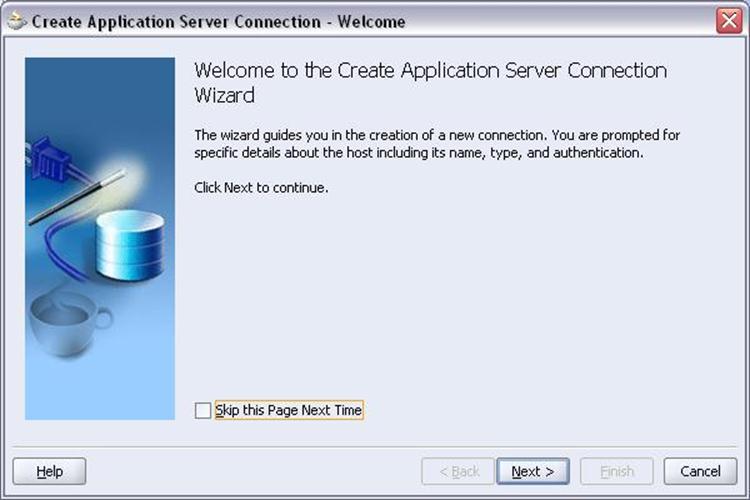
 ![](https://lh6.googleusercontent.com/AiObOUkgvC10H_DqiDORPvpYkd1D7cK9nMaOIlFG5k59Oilc2xswxvLJ2TndjgNnaze86Vsf0vXr1P-oITkwDvFfrttrRI3xsARTPPmKWkpHs4l5VPJ1sEAG91aTWp1hWHs)
Click Next![](https://lh3.googleusercontent.com/VOh7sWermiHyBOyjup9oMWtyw9OSWBS0KfHMjkOqA4VE0bbMR0RZE10z9-NMbTM7yk4hfPr1KQ5VN9CyEiBe197eJxJlUKUoRczLxk1WH1gUpho116hRzn9WcjDFgPFqhGg)
Connection Name: AppServerConnection1 (you can change it to anything)
Connection Type: Oracle Application Server 10g 10.1.3![](https://lh6.googleusercontent.com/fCMMV9H8ML05mya7CWBinUyRlZUxeXH8WCEs4SyOu9_QFHhOaoOiRXjO6v6OIHa-MXFvfORJv_5AwW9Gkbgu8v3WMSjFITIudzrLzJRJvCvmJWjFN3bU4fWjueYF64VTvAo)
Click Next![](https://lh3.googleusercontent.com/BButM1pDFWbClX_G3BpoVpAHPxHZTgK3scjXawABRVrhcfJesTAMBpaEac0FzTRJul68hYiPzqDuTh0vz7A3DCY0ykNxZu68FYmcLhY2ljdOnXsoR0_RWAXoq7kYWAeMIf0)
Username: oc4jadmin
Password: welcome1(this is the default password, if you have changed it use your own password)
Click next![](https://lh3.googleusercontent.com/H2FsN5MYAcUmb2glcZExItRPVPmnYzopPM_dVutkPpzKlBsoffBZi6tMl3okAi0wwkO2687fBhbQIVmEWgxRRVqJmhI9ylgbnuOHTSqrzFWN4XJMLpY_Kh4al6p18XIXLIA)
Leave everything as it is and click next
And then press Test Connection![](https://lh3.googleusercontent.com/erxkI_c8Br3TZOi6ffb8nusW8jLqHeCOb1rpIeEXhEmS_0o5spR4FDGCaOhXp6PptPXaYZgL3WKYcUshYW8-cxN2TOS70GUyYdedJuBgEi_-dRIJQ-FJ1cze99kBDz04tL0)
If you receive the Status as Success! You are good to proceed. If you get any errors make sure your application server is running and try again.
Click Finish to close the wizard and return to Connection Navigator.
Create Integration Server Connection
Go to Connection Navigator by pressing Ctrl+Shift+o![](https://lh3.googleusercontent.com/0hLfiUVvVQcvQTkYFULAnFoRq-wpql8ZdWQ6GN9bzNd5EGCK5xz_8cj3mXxMUWRd003TOlTtMLx9jTT4-_sQ_M_55famRoM5_miMUk6GKn9sQGnPb9F46osiCFGZiZyqI6E)
Right click on “Integration Server”![](https://lh6.googleusercontent.com/6jUfMSLL0fjpXCWhGOLWUsGLTQ6ZLm6q2eq6yUTW0zH6JeoT02dos5VapOMgpwr76IA7nkmlzlpcgQJxvsveBF0-zFLYkKuqVOmwWMF8OfU9tmylxCps7chj_1jAYtZUkJ0)
By Clicking the “New Integration Server Connection” wizard opens up with welcome screen.![](https://lh5.googleusercontent.com/7fipoD5yqZ58ax8n38xz0VrXEY2YluJTSaqhJDwsMkcYHK5LDvBOAps1mHdQbxv1_EaFTOiNZjgzd3PIpeOL3f6RXHAu62MvAHFQ5sCMZVNuaWjbsZGjiWjr-uCQm2QXsZg)
Click Next![](https://lh3.googleusercontent.com/U1tRBMUx_uy4IbSwHda9X2SKTLe9M7B8OSeH-ezV1Nw3ZDNMEn1bT3qUPoOrBnO1ZK5YEVIV2SQwKLDWgo1ObT9eIecyfnKBLYfieqR-8C0KUnIB79GKaYM4j0TMHDqJ1c8)
You can leave the Name as it is or change it if needed
Click Next![](https://lh3.googleusercontent.com/S_5pyYyb_2aDQ3GnqW_79Jp4Uz_J2YuJWueEvv7g2BzsnLP2_SzZzL91_p2de9Ss1QVxemFoi4nFpwUGNJsj5Nl8g8Ii4NFiCgEb_se8XNJisHFNimg003B0rhNngk2ep5U)
Application Server: Select the Application Server you created in first step. If you have only one application server it will be automatically selected.
Hostname: localhost
Port Number: 8888
Click Next![](https://lh6.googleusercontent.com/CDo5XDJaSW2kAu5xTA8wL7vxgoUjqVQj_lztz3K_nAlI_ciSyIM_vckFTngvlzPeqjMGeiSPjaZg9fhLFBnseOWD619XiN49ARksJA_3XMeVgg1Fw3LSVYHjc9NgFixC2fo)
Click ‘Test Connection’![](https://lh6.googleusercontent.com/x_tAjT5qsuK_kjaQdza90s8r5DmmPNidzV2xLf707Mr-cM2QwQSkRDLn5MgLnx6wumw_BX4HRxj7Y9E5FFyC6LF0LFPFtJTfz0Jcq-BCnoVWOpIss2bVEldM0sLeCtk8KLM)
If you receive the following message you connection is successful.
Application Server: OK
BPEL Process Manager Server: OK
ESB Server: OK
Click finish to close the wizard
Create New Application
Open Application Navigator by clicking Ctrl+Shift+A or go to view >> Application Navigator![](https://lh3.googleusercontent.com/U-FgETrMpoEVAi2eJ9BMP3N-GKt9vAdNPn6bJRSkKhptJDmqn3mkVIkxncJ8j237ugJGOesLBc5zaobDue8ENMGJiuVf41aVvOPgpWzALYRqjZ8mEjnopAr00lo47HHOVDg)
If you have any Application exists you can create your BPEL process under that if not creation new application by right clicking the Applications and selecting New![](https://lh3.googleusercontent.com/QkDBrNk9lT0b5LoF0KGC5O11eaCG_-2Pt5-Rn4gX8f5p-lvV0eeBDA4NYKatr8a8c5VRsHg_6BBfl6Dk2QxD_pDCvx3NozDQJW-zo0RCf1qm0zNrn4IfD6-Q0WqSM_7eC20)
Change the application name as you need and leave all the remaining things as default and click OK![](https://lh5.googleusercontent.com/HtewBJGpp3Wm5wbMEpkkMsXKQ8X9fKkIWPiDl7dQik3vl6uWEdUyIuOImsYkDsrnc38RR8iiugyZzaoDigSmzZAGqlyGCJk31_lnLCf0V7DYZLHQGLv5Ee7Af3r54Arf7mY)
Click Cancel to cancel the project. We will create new project manually by selecting the BPEL Process project in next step.
Create New BPEL Process
Right Click on the Application that we created and click New Project![](https://lh4.googleusercontent.com/4zNehCusHzZ91J0lPjpX9RwFuB2slmbINgPm-6tO50PHq8bwYEkFL3pUTbO5OsxRf1zU68pAqnBYOcpYJ4rBfpvT1VrmsSDBH6k3KrNTI30vMJroQIvErMXzQxFkFhO7w1U)
Wizard opens as shown![](https://lh3.googleusercontent.com/cnwsRn0srNseIrfD8zKRbeoTioZipzixX6mFVkHx7nfGDyMORSRnDGD4J3Pmh5stdBqP8uK2et8d-u_v0ukTt909fE9raycyxffSXzSiDOPTMfURS-TrIUV7xcqQIANsZXA)
Select BPEL Process Project and click OK![](https://lh6.googleusercontent.com/ODE__xdpQ1q3I3InU1N4g1n8rgnk9SJggttHvXmneHDXou7taGtETGaNG_SQRVfr6TFr_EYMxUU995zkYLSfmgdEq0t8aoW2lZylC7fZBavKFnjRqAs1u-naOkeSQ-Qs6Ow)
Change the Name(optional) and
Template: Empty BPEL Process
Click Finish.
If you expand the BPEL Process you can see the files below which are created by default.![](https://lh5.googleusercontent.com/MHbNs1jhmX4Ncbc2CSFKrfSzkoP6Mx1aoDLoXbznXqUDAxvxG2PI5GIPIQAWPpNpHwLV4SP8tFgnWUU6N_IzTkMjCZGk64QuRS55ER72LmloS9zuICxdE_W6AkzzYqmbAkg)
Middle panel of jdeveloper opens BPELProcess.bpel file automatically if not open it by double clicking on the file shown in the above figure.![](https://lh3.googleusercontent.com/TdEElqbf2iIakynx676mYqCqKikWFsH9dRerO_O9A3wnb3g7KHK7ZQgSvS7XQKDoU_ThqcJ2PxLiKqPwiwI0LycJ0AGAkRUqRuU-8HM4GWqErHx30mNjX6gxmM_X37UVHbE)
In the .bpel file you can see 3 regions
1.Services(Left Side)
2.Main Activity Region
3.Services(Right Side)
On the Right Side of your screen you can see the component palette.![](https://lh5.googleusercontent.com/qRAIWWrmHGGNvSPSpUBy4x7V4MkRCG_8XOZcEKebnU0PYFQ0v5CPScYaNnEoP9ZegfQbfX3c4_Hd7nvQ4LgxFpvN4zH1rbxQFBzzni2u24VOb167FpB0LO4cg6xa875d_rY)
From the dropdown select ‘Services’ if it is not selected.![](https://lh5.googleusercontent.com/5Fe_pnV5raR-bahKWdUx5EuNi4fUCmUvLptOASY24-rOPWqGbt-sGR9AGFzDJFfhCcO0hIutjCnfXMoyW-9QI_XriN4wKEQx9Kkjbb9pdV6wJdPxlKDJUgVbojMCyeRUAmU)
From services select “File Adapter”![](https://lh6.googleusercontent.com/nCw7eAGP4TRFYXXNRM0Ymak5M6sjlLPRnfbn48PJi7Gvmkkq6SMeoSijDwbzIxkAL1gMs5Eqrvzlai8z7xvnP1qI0cAjfW9RkK_GP3t3a0OV4YbbXrwEtyutv177G7Sg730)
Drag it to Services region on left and leave it.
Automatically ‘Adapter Configuration Wizard’ will pop up showing the welcome screen![](https://lh5.googleusercontent.com/q0KWgFXKuzx_v3crPeZBGNe63olSQ4zhJ2diWt79ELpEQIis15WLsnETiPOgw-WtvZcK0uK62etXrNRLNdgeg3HEATabeHo82T183ds1aq4Th_nm89z6lFkEajNfcHqvie0)
Click Next![](https://lh3.googleusercontent.com/q5wtYbG4tVkDnilRXI2EwBzWWw24T_LTvhqRsKCO3CodneJyRZQubTHM9od2ytgF9oVRk5vY7BJQbNvM5FGWDQMAb-K6XwNGIPgnKYkwggqdnSNJbW8GhnowUqPnFhTx-zg)
Enter Service Name as ‘ReadFileAdapter’ since we are going to use this adapter for reading the file.
Click Next![](https://lh4.googleusercontent.com/1mWGmfQLeFhab8f6u7m1FSHHncPvxK4J7L2JOFfWc4tTi0qzky8d598I5BpJx7f-xl2RbQZDj02YPjORjjax0eBAIvE2YKkZnJYchXpr0lJH-jxvEtSg3BLxeWlsDVM8yi0)
Select ‘ReadFile’ and click Next![](https://lh4.googleusercontent.com/p5vy2Cn5rVCbjylI9oUiZEVNjVG6gsM1Ql3we7jH9u1cpSj2Jbc-5n3ypPazurwFGwLjeEKJp2A5AlUuFbJof8QXgCy5MC6srDwitU7HsPlvm037WYOOXaowYD59hHgm6t0)
Select the ‘Physical Path’ option and select the path where you CSV file is placed.
I have placed by .CSV file in the ‘C:\readfile’ directory
Deselect the option ‘Delte files after successful retrieval’
Click Next![](https://lh6.googleusercontent.com/81G9Rkbcu2r345aP5jzzZD_T1F9NNWXCftaPT2yyiGfVJpe8W-Ahlh77AoxBcwgtOuHhtoQ5hyYsTWJKXplcHoqbF9qE-3jecovXryyi9tbyuXU7-YIWbSC6CP88iulQW9Q)
Enter the patten name in ‘Include Files with Name Pattern’
I have entered erpschools*.txt which means that all the files starting with ‘erpschools’ word prefix will be picked for processing.
Ex:
erpschools.txt will be picked
erpschools1.txt will be picked
erpschools2.txt will be picked
1erpschools.com will not be picked.
Click Next![](https://lh5.googleusercontent.com/XuAsG638Sts47Xnp5CIs1dYYaKIpC-1jODWHsDZqnG8AbnHzE9qGATk7NH4DzNnoYeHk2rckiHjQTR9dT3Viv7jCVjSa7t8FHhko71Wu-MCh0tBmpmKgoosS6j6OWakVW8E)
Leave the default values and
Click Next![](https://lh6.googleusercontent.com/XwbpVlDsYNc34MkDvzoWkCGkmp0EvSu6dsN3ALe5XbwDTApJDjpYaQlEwRVUVH5tkcQdc_ofQxOfMjjcOcD88S7juidv-LF_q1IZzqzH-RcqYda7KiO1Ad9A0TQLwJBgz0o)
Click on ‘Define Schema for Native Format’ button![](https://lh5.googleusercontent.com/jQZ8mYgN__tMhTJ6K1wHWiKQE3rJ2JYJigu2IWKeyT36Xw64rHmgGdv8itx72RWDHC9I8ov66gLHZgsZJkh7nImCmQCnbuvfn27h57ww3XNRSp5wO-j7qgeblEv3X7MP_-4)
Navtive Format Builder Wizard will pop up with welcome screen.
Click Next![](https://lh4.googleusercontent.com/kfahEOCdw_lbI0nBqUlT1FQZPoHIh1cvwDoXlXxa5_wwOLWSRgvFDFCec2QliEKNS3D4SDFdHkagmROizE0xK8wxchfAv_ZjlNrebUuo_STkZveDnYArSiOoFHPbaBaGyQQ)
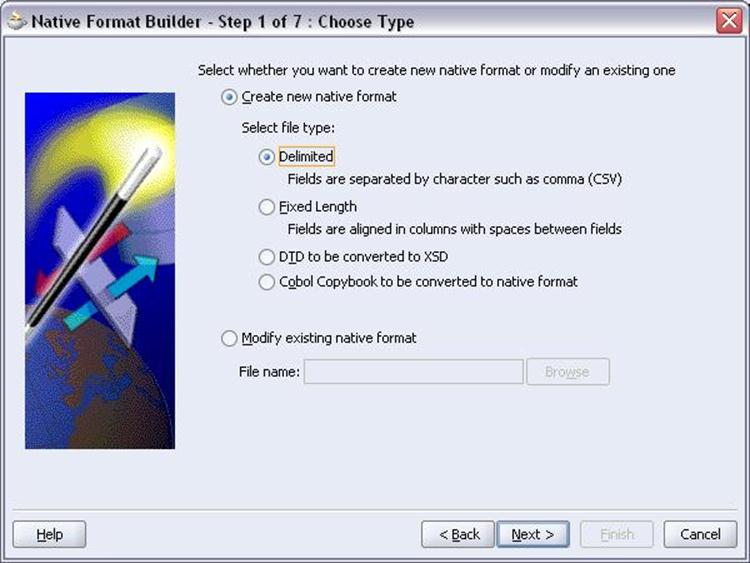
Select ‘Delimited’ option and
Click Next![](https://lh4.googleusercontent.com/sHPQGIUu2mn8g12_XjVXibC6DE6UDYe0ZXhzZqx53Qdum_xPj6HAnYIIV_R_iEbJO1Yf9lA2rwfNO790i88XwPsqaSPmFRevFtCpW1BNKtV3hyxACMGXhtKbPxwp3158JQ4)
Select your delimited file.
My Delimited file looks like this![](https://lh4.googleusercontent.com/mWvpPIXK9kr4bNWM_bmA1ITXkYImaF4H5isH9ZtjVeQJHIt1k2S44u-p8pgzLCuNZGbkSYkPcgChCobfRFkOsTvS9hatojOYHzFVGcxQh92_KmqZYRxe9Yok9HTz_BEbA24)
Click Next![](https://lh4.googleusercontent.com/B8wnIKfW-8puSDEvoMWmg8Sikh5nGnF2x8FK0HdFbZ2JhEGtXKdnaRFT3x7vl33XMFqNyANnll4ISxVHyJnom63kfVrTJwpZLT-7FlTjairTu2R1lU0LKoHpnfVyCqGalYU)
Since our file contains only one record select first option and
Click Next![](https://lh5.googleusercontent.com/ofrWgBsXSQcG9ltGsZOOlRS1wWXSehHj2SA7_ka_V_jC26nHL5fWJAgUmx5jrQWrTbsqOqQEE0qut3wBwakwHq_LfLxd3lwiP1xjJTz5A92Pr-DW_bHQmBjt37AUdGo_jXA)
Namespace: leave default value
Enter a name for element that will represent record: readrecord
Click Next![](https://lh3.googleusercontent.com/4YUuj7lj_wfh4vT6P-kVOQrsKQ7JNIErDHTG2uoWVdvC59SF0veqZaqd0pU-9KUcIU4jF1WknZAWDxa5NgGW7Sod2b2mO_P7nbaVom64T0QFWwnnWvYOZ-60DPOyW16xgfI)
Click Next![](https://lh4.googleusercontent.com/jzfC3aVrfWcxf8sVjYnnT9Ipkwt1n1vKoX4Y-j_ABl0Cp7dX_KC3_FlKrUjU8OHN323_KHd1c5wLQkuMJm53Xu0dfCzaXU2TkxLqwpauoxq69ESLUh7azsHxZD8qp8ePNq8)
Change the column names and types as needed and
Click Next![](https://lh5.googleusercontent.com/8pBRW4GKuXyjafA1tKlsi6otjhmB8kKNx3IEjIDzm09H3NEvHVWxBYoKqUQySPKzVvCIE1nrI9s4eUYxRxYPi_0Qo0LzZ2t1chjLoTNG12EIhp4aCIwF--vXmMpUV-xENYs)
.xsd(XML Schema Definition) file will created by default
Click next![](https://lh6.googleusercontent.com/n0VHKdKnJpZA6pB5hOPlpShI9_ThiQhAvA-qJRJa4Jv-RjjpOelM_tEvL1ETOHx9j8OoRlsaVhzejuvmY5t6OF30TbwNYhCeJoIeBOO-68zse7a9XuGEClbsg3JKoTMdZSA)
Click Finish to go back to Adapter Wizard![](https://lh4.googleusercontent.com/fm_ZkBti5FV_ls9L7i_DkzKzu8o46hO1EkIG2ufbbbWA4hCktvIlSyPE8PIqIoFWqd1ZgF28XRj3brnKzLhSHHHYlQN_ukLVmwD1wkjTXvnEO90bqBeppfz1T8r6dRQ-uLs)
Schema Location and Schema Element will be populated with the values that we created just now.
Click next![](https://lh4.googleusercontent.com/_tMhwExVBr2IsGcnvQJCjzJ3lO0kqyk3aQQ1GBBnrTQIQYYDiZInZs-m5FjkpICU4OfqmG3O14OYbjd9CdMy5TUW6vWTILnI3ftX1Hj127DSwA6KLS0jhybAiam3nGQWF7Y)
Click Finish![](https://lh4.googleusercontent.com/ni2ocW9dehZv4j-z7UOrrJeUlqgkS9zohPFHyV6ERBOifcNf_Ow062HBuVl3aYpR0WXpVk5X2l9l7GlGsi3nTT9EzZL7KPaRo5cveozyLcB3IduhHfSNAiepJlyB-WSWmWk)
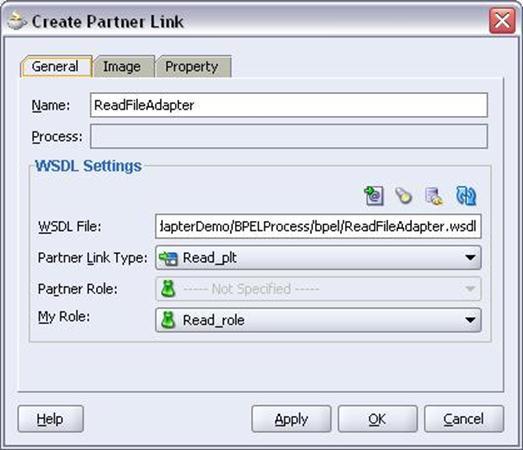
Create Partner Link window will show up as above
Click OK![](https://lh6.googleusercontent.com/sY6HTQw5lrCvSS7qMqZ64WbtjloGAjZO6NjNQ-VVshAwkg9-UedjUNw_bznHLJMTe-aqoD358ylbwLx2Op08ecwqaJiq93UIr8gQ1kJ081CXCYevjIz2TcBfbahqpJHXPME)
Now you should be able to see the ReadFileAdapter in the services region as shown above
Now in the component Palette select ‘Process Activities’![](https://lh3.googleusercontent.com/a2T_ZYIyS3bgoLhD5vVkoVHf2I3ys_hCrbQKiYO_FFdbW_K0tAdiPWRf-1Zk41toClNoJqv9mJ4zjZezpVo9iMTVR-hJFMAV5oySj5t8fSE5RVDjkEKuh6kVpFEX6h9FiEo)
Select ‘Receive’ component and drag it to main region
When you move the component to main region it will change the color to yellow then you can drop it.![](https://lh4.googleusercontent.com/CQJTXWZ0Gj5S8I4uvuNoH6TODETYmE_4sV_ZRjNM-mrB5uGH2zBMIMy0P-5PeTpxEXfog0fBidd1EF53cliNMmi_sfqlfy3FKiP9dWl2xwqycgVwVRDOXPiJtHiHSETXp7s)
Double click on Receive_1 component to edit![](https://lh3.googleusercontent.com/6vD9vjGZzQiUEm6VmPUR7uSoTqP6QoK9YRcGdThtMqKkRyi_CiE0RGu9CcFI0l9s7XyN65Ws2_LLOSHfu5VDe2z8yvG3XYdAdqNEhhdxjLPR2f57hZ0urRkkMbCBR-opz_w)
Click on ‘Flash light’ right to to the ‘Partner Link Field’![](https://lh6.googleusercontent.com/6U05bu3VCRSWsO9Qh_-9ttBAS8v3v2Uj6WlLyvJXUWSXi89miF1G_ptfbKLr-eyRKOwCqLbAe9L0AJEUzd4hmYMPqwVGz2D01N5Zsku-MtgdnRViOCA5ky4yQ2C_5zJvWUc)
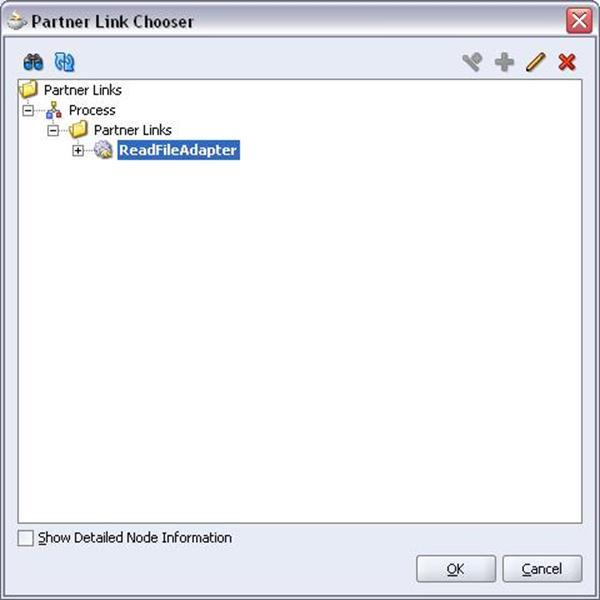
Select ‘ReadFileAdapter’ and click OK![](https://lh5.googleusercontent.com/XG5uiUvuoLHnaakRPmuVGdjD0qa_8mb0rUCcHGCM68viu_qlKM0FX7UYJ072rZ_h2Ex14wLrEpW6SV3WdEnxkaenWRPxhqXCzyGthkoUE86GyEKaz3dNFekUBFK-aZh-ccw)
Now Partner Link and operation fields will be populated as shown
Click on ‘Auto Create’ button right to Variable to create new variable. If you don’t understand which icon to click place your cursor on the icons and you can see the hint text![](https://lh4.googleusercontent.com/xrQFarp7O3bfjuoZNVNq9qrGevlEWys067comCndPZ16nuJ723rYp7x5gH92izqAx5MZFF0o9v5mMOWqvhXz5XzjkZOgtwKvGLMXFqXjH4CCNN3gA6topNW9kXl3AsJlDOI)
![](https://lh3.googleusercontent.com/gYfyIwg3zthOyYkPz_uuF7WutLeYrWbs34972EekwvkfsuS9_7lEnAGK92B1a-pUuXk_PVSXm9jOAX96BU5uH_IoaUabJgn5-EUHkQp_HIvHEB8mpgMEdY8F7KFfp6i2YbA)
Click OK![](https://lh3.googleusercontent.com/bBT64Q5fXsdCDfAR9EqVG8J35lhEfTK0i2lPRXfobr7Hj2v6DUk91aSpice5OL5PLosyTjBGId4abvA_VPidzreCcHdTwGFqq98ZxSkWciU6TUxuwNjqMSpJRORhInjj4kE)
Check ‘Create Instance’ box and click apply
Click OK
Now the figure looks like this![](https://lh5.googleusercontent.com/PEoiswZ1I5qqHh8_0Rj2GUEZwZ0EhaaBYQcLbYoWpP3BBHxNvyXYjWuU2hBc2gFiy598TEjaO2i9uU-EJPTm-8kM-10sme6kYEA6xg-hvv-fPP5T2sxcXjRDXhjfRMF5Mc4)
There is a link created from ReadFileAdapter to Receive_1 component
Create WriteFileAdapter
Go to component palette and select services from drop down
Select the drag FileAdapter to Services region on the right side
FileAdapter Wizard will open with welcome screen as shown below![](https://lh4.googleusercontent.com/ScrwYRktJ9fBX9zvbemTdPq-Bpd11YntB-hubKc3Rp5txoS46VYMxe9uCr6yyRooWfwntCUAXKkhe_iNV9QuyhHU_r44Qaqm198cO0PY_WbiwbGYwlobANYbUbPxMu1nZWQ)
Click Next![](https://lh5.googleusercontent.com/Ydqr0SKkRalChfp8adoWNz20HyGdRM6EFw7JcXgD_3eAu2_Y2we3uXqdiqnfPRePHHba3JeQWS_BPpUDXXiOnlA5sKpTT9VMkkbeBWo-Y0vU7wYhR3BFEBKxRmvczJmONOI)
ServiceName: WriteFileAdapter
Click Next![](https://lh6.googleusercontent.com/po-g0yydLa035V4dOhvprd-fs04353WcVbyatT_NS2uRUGCkRsvXHx5UPZygQ4tnT3ifFBnITkE5YDWZ036uSBnMIMQmy2jqCH2nCkQtg769YaLxTkSF1wXPBijOoq1Ol6g)
Select ‘Write File’ option
Click Next![](https://lh5.googleusercontent.com/6eDd-DThr-H_3CQ92EGLzWN3OHgX6H5fo7ibl6B_bFy8_8LGPiOEvKIIDBiE_goN1PuV0ujDVnIjGUQ6ZpUZyAGB6NOMY1meRqE8P4Edwuiri30R73NThZ4SoiP100sq1Eg)
Enter Directory path and file naming convention as shown above.
%SEQ% will increase the numbers from 1 onwards which means if you have 10 files to write then your file names will be erp_1.txt, erp_2.txt, erp_3.txt …..erp_10.txt
Click Next![](https://lh4.googleusercontent.com/u5PBeF9uQ4pOsAd2c9n3da4cMFcytAISJZFKtfjG9da_ezDc4zhy6M9WjxvcbXO4isrccUvH6aFwLzWv_Yn2U_lwhSExNqscoyXgTDv_NgCZOhynQ8EbpkY6O9GUQq2DDCU)
Click Browse to select the schema file that we already created before![](https://lh4.googleusercontent.com/GwXDBqzwhhXhkB3vLNLq0dywmshPbgSkOAZE5h-4HyX3PZOAKpXzzOY4cdQKBhIHYEwTyUtuEPnOL1yleRyuGo7F4BdhYoHFloTPEf7kvfvpDe6IXxaGhAY3Exf_EtqahTo)
Select readrecord
Click OK![](https://lh6.googleusercontent.com/A0wWDYTYV2WQ89wBPyn2STyaeLIpfjGQ1uRlIekUl9laPXNnpJXDIzLR3xT_ovAE6f4-dv3xP6ilYFfSpl8aJWJCjcsnmZ3kAsLQV9uNJ0bPzHASmkropa_E9Z2Bqioo0FM)
Click Next![](https://lh3.googleusercontent.com/DaQStLt_UZsvFgzSXth_RzYlpRY5Bw9z-IXJwPc76bV_XJ9Mj4SBLl8qDNcJIypx9KZnztAIjQpwoXDYxrFKMWE9u81fqhhtwBV1z6yftSne9naIJP52fnZ2rKSHS24YTlQ)
Click Finish to close the wizard![](https://lh4.googleusercontent.com/6zzgCaUshqcTz7VZXIsAW0o6WAht7nhiGfzTO3rHzmhr8pDyGvQpq7-ePwRyLapjIaaoy5mK4e53BJhzxfa_Ub9_EnylbpbjdFdahxqIano7FEUXVQVnCkqWoROY5riYR18)
Click Apply and OK![](https://lh4.googleusercontent.com/zqFwpf-oej938AKXaUMk82oZLwYBjusWY0RxrPDVQ1t6vDJ711yJZfCmLHOZyedE5OLOy2pV6lZqZkYREUrua9hsJBTOSFJMwpo8zkGXDc4PlDVZi5_S5JU0DO9h74cxDN0)
WriteFileAdapter will showup in the right Services region as show above
Now go to Component palette and select ‘Process Activites’
Select ‘Invoke’ Component from component palette and drop it below the ‘Receive_1′ component
Double click on ‘Invoke_1′ component to edit it![](https://lh3.googleusercontent.com/4ZfS01tTUq-tn8uHTPK5Gmb-9iHAQLErI46BLY3oFoDrqK1bm-RKrYzCqBB5zk_u9JS11PHdVhnM2kuk-LDK7xGd6moRgElnnH8olAHLG9Q0SGcWiSDFg7a00XZC_DfxvSA)
Click Flash light to select the partner link![](https://lh6.googleusercontent.com/2RqZvVfixw5JqM2KfX9_WutrNMFvUGgvjiLsuepjye3F6va6752AjQ6pZrZi9tHuD6mURjQ-2ONKHxb_ncuy6Gm_jFLo1H-jpA2za1IyCHiTKATerwWrewEWq9vn1DdXSiE)
Click ok![](https://lh4.googleusercontent.com/LIUZyTLBUtDt9-r8hit00xtlf9WJW5oYLR19OFF9UCoj8YpUzfLOzDI9RIEGZoyUnKvZtUjwxQx9vPhfIJTQ3RdPjSCbJjvs0bIvJxlzDY1YO4Y2TcNdOUotk-Z0puZ-AZE)
Click Automatically create input variable icon to create new variable![](https://lh6.googleusercontent.com/KrqT1opcWGNFo8Af3yw4GD9BS-vGT1EX13jamRuW7CjbwFoYQD02HiVEPpNDiZLSSuQlTLISMVQWxOP3XLufpL8_floqUe1_txaAOELociTHyA6hMj00Ks7nKq1MyK78ZgY)
Click ok![](https://lh6.googleusercontent.com/SQh8uYAY0Bymrz37yCoGR3eDuEvh03olDLFN0xvvyxKAfynP0xnqx1BuQgkKQ7JJmn2pAl_xYPDnsxSJZ92Mv0XmNR4rLx-aCygDwH4oLuCHqwcxjJUVeBVCzKMf5ySA13c)
Click Apply and OK![](https://lh6.googleusercontent.com/XEJuD4ZUIMNVUsaYPQGOQm8eOvxo83Siq1k5MFT8mwVlrztEPokr5izoy-VasLfx2Qwxm4_5O46wAePUyWQh4DbRy7tn1OZygQNI5_RiFji_w6ibrpjQ6uvsCjER7jbA4mk)
Now drag and drop the ‘Transform’ component below the ‘Receive_1′ component and above ‘Invoke_1′ component![](https://lh6.googleusercontent.com/vsnHKUXdnckKF-PeZg6xdGS_v0hh4unezneDwwUxNbHgfArq2aq6Av-fSktVUrtatQXLsrw32CUvF6Vw7O5lqMmss7ngoX6-8Y1IV_v-UJMZDZ_dselw2y4E-V4TXzcnowQ)
Double click on ‘Transform_1′ component to edit the settings![](https://lh6.googleusercontent.com/4w_axw-gAmZro221ZHnFk2_ozpZtnozuoHrxwA7gBUh2wcVAbsQnohb3Sh9sA3XM5Ev6cRDbmmjgTvKmzDdAHijIIe-ODiBPULjBPleAvQUuip3r56n1j5b2f0qE5v2q34Q)
Select as follows
Source variable: Receive_1_Read_InputVariable
Target variable: Invoke_1_Write_InputVariable
Click Apply and OK![](https://lh6.googleusercontent.com/4I4QjEWYSFJ_N7Q-gbsA-8EqatOdPCBUY_gcNllgOfiEvDqk5-aSyU2wpgC0_ph8h_YxxMilWfZPWy23KumZ-Aw89FCFSgWchKQ1dqvPf9IPODXBdnKtdPfe4w-JudyY3v0)
Transformation_1.xsl file will open as show above
select ‘tns:readrecord’ in source and drag it to ‘tns:readrecord’ on target to map the fields.![](https://lh4.googleusercontent.com/5KBahMp7yfjjB_6MyTklEppuHUIXX6guFWclS-5PQNn-RL0VK0H-0leQbQdt3-HlWOGmoo4aTqihNiy_gfgLTXZn0dKOHxoDWkvo2aHR1f9yEQ2vxMBXkpEBq2XPQ4d9Crs)
Auto Map Preferences will pop up as shown above
Click OK to auto map![](https://lh3.googleusercontent.com/dEqNiQwJGATz3EsI6pEQg2GlHQUH5ELmC_pR4ZZlXjEHgwSi5XNxgYjYVa6EClDHj_dMCkKM6BQljixSORsfmLBW8INrPCHm3nP3bXqcdQMcX3QuXQ8SnPefyHFa1kNsJSw)
All fields will be mapped automatically as shown above
Now select BPELProcess.bpel file on top and click validate icon to validate the process![](https://lh6.googleusercontent.com/OIc3GcBQS7CzDn8YXZnGZRf1QjlGnEf6C2uvbJ4eqTsaq8BoPqsh8JC8xrqZXtnOwF5b0abzVCDlY0kFmi7b29NsviviPr3Ukj_ZAU6g1hdOsZWW8EDeVPnYtPR918QSZvU)
Once it is validated with out errors we are ready to deploy the process
Deploy BPEL Process
Right click on BPEL Process and select Deploy option as shown below![](https://lh4.googleusercontent.com/P69yj6rbjnCr6Qni0GIA99QV0FzI6eywULzinl3jhfNfPzSuZkA8lKm3KyOWEiy1HJlw-WobXe9VJRqi0KZf5dqrN834pK5rED4prwB2o7t0snXI9-fahfZbCyFRKijfmWg)
If you have this process already on server it will pop up with version number if not it will start deploying the process![](https://lh5.googleusercontent.com/VEsbl_o1yh-DSjbiNaoDF-mmCBcEUqBVCmIsolDrVbKDBKDwo64nHJAlbVh-ubEzmSD-yTjQgsmRjAYoZ5Y7kJb7zkjRBxUpA3dJHfLsXtwiHpjvkVpxDR_xeVo0ZvHy_Pw)
If your deployment is successful you will see the message
BUILD SUCCESSFUL.
Initiate BPEL Process
Open your browser and type the following URL
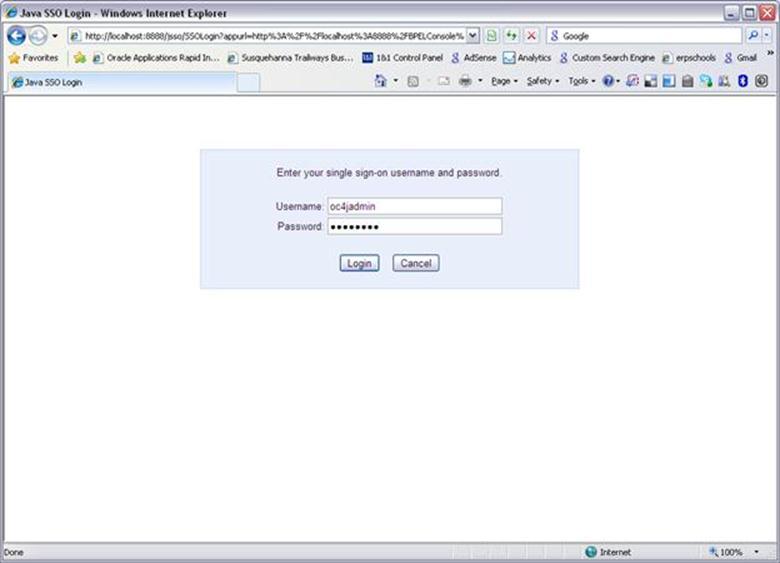
Username: oc4jadmin
Password: welcome1(default)
Login
You can see the list of deployed BPEL Process on the left panel as shown below![](https://lh3.googleusercontent.com/d8-CduA0mdlK7t1AM-iU2a7JlEqCZgitpu6S_IbvKFQGq54RmqRyrRJsrpxR-Sq7Pn-3vgPnIFHnQB8HhVHu3ULDX37O8PHBiu10d0_VMiZiLOmbub9DtZd37aSBXi5gRxU)
Click on the process we deployed right now![](https://lh5.googleusercontent.com/Prey82q9Xq26czG13SqBFBrXZwYqVbITyuPgEv_uhtSlTIwJXoGi2Mq1LGNsHZqiwEM-isODNv-j9722N_sN4WXNgDCu_m4fxVKdNTkipYx1-WyLxDePRju7ZIUOpBBLuEc)
You will be taken to Initiate screen where you have option to post XML Message
Now your process has initiated
Go to your writefile directory to see your file![](https://lh5.googleusercontent.com/j3zOKHUpTh2Psr9RMR9tMR_ERTtMJ07gr0TR1lNQYq7TEifmSndcLWJj89qK16AOVvEergRmvT_BgVVC2tWxKu1Eg2Hgdf74aKbD0ohDMnh1lnHtpMvX2PKcHBw_-sgAXVI)
No comments :
Post a Comment